The original size of an image is not always accepted when you try to print or upload the picture. This is especially important when you need to upload a picture to the web, as different websites have different requirements of image size. Fortunately, resizing an image is a fundamental task, and there are dozens of apps for Windows that can easily resize images in Windows.
There are many image resizer tools available for Windows that will let you resize images in Windows as well as help you do another basic editing. For example, you can resize image visual size and also compress it to get a smaller file size. Furthermore, you can also change image type, remove meta data and crop the image, which will lead to changing image size as well.
Check out: Top 10 Best Free Photo Editing Software to Edit Photos Like a Pro
Contents
How to Resize Images in Windows?
In today’s article, we will show you how you can resize a picture using different free tools. Most Windows versions also come with an image resizing tool, but it is not so reliable and doesn’t offer much control. That is why we will be using third-party image resizer tools on Windows for this purpose as they are more reliable and offer better results.
Tip: Resizing a small image to a bigger image can lead to a considerable drop in the picture quality. So be careful when you resize a small image to a larger only resize to the point it offers good quality.
Resize Images with GIMP
GIMP (GNU Image Manipulation Program) is the most robust free photo editing tool, which can also be compared to the paid Adobe Photoshop photo editing tool. Resizing an image is a very basic function for a strong tool like GIMP, but still, we will use GIMP to illustrate how to resize images. It will help both advanced and novice users to resize image according to their need. If you are looking for a lighter and simpler tool for this purpose, skip this and check out the tools mentioned below.
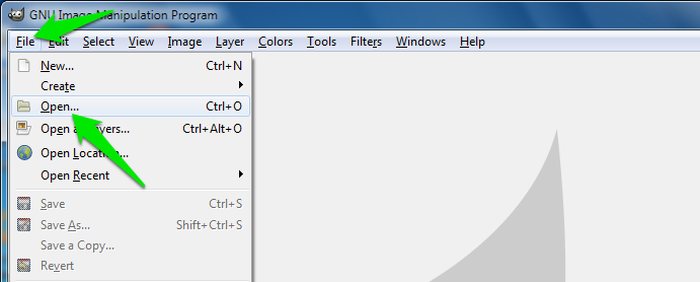
To resize a picture with GIMP, you first need to add the picture inside the GIMP interface. You can directly drag-and-drop the picture inside the GIMP interface, or use the “Open” option in the “File” menu to select the photo from the directory.
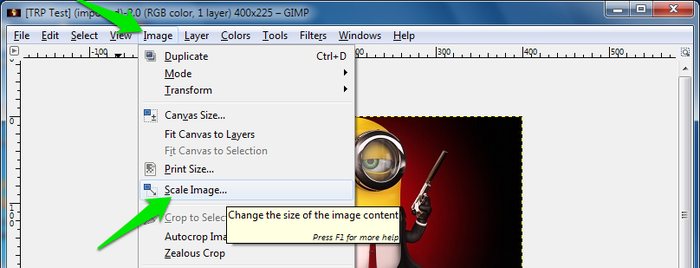
Once the picture is added, click on “Image” menu on top and select “Scale Image.” Here you will find the Width and Height option to adjust image size, but there are many other options as well.
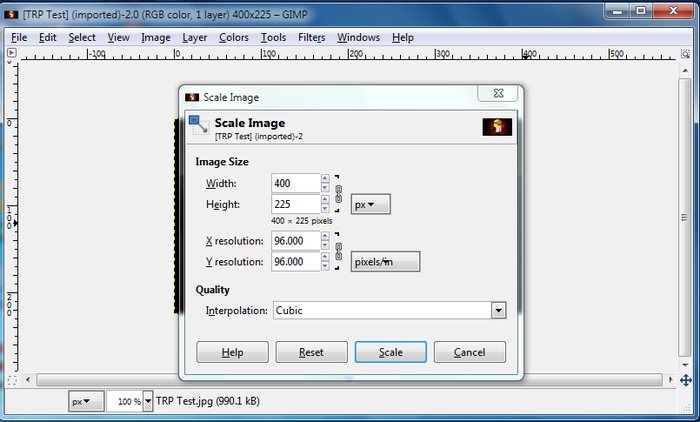
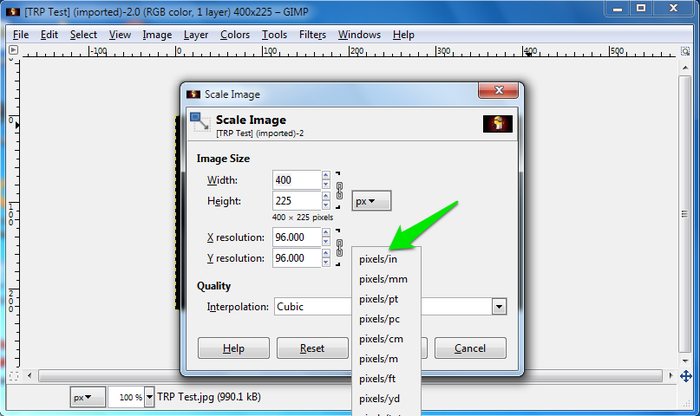
You can adjust how you want to scale the image, by default it is in “Pixels,” which is the standard. You can also use other scaling options like inches, feet, picas, and yards, etc., but novice user should stick with “Pixels” unless required.
Quality
You will see a drop-down menu below the “Quality” heading with multiple options to select, including “None,” “Linear,” “Cubic” and “Sinc.” These are algorithms that will be used for resizing your image; you have to choose the right algorithm according to your picture’s requirement.

None: Use this when you have a perfect image without any sampling.
Linear: It should be used when you have very small text in your picture.
Cubic: It is the standard way of scaling an image and best for most photos unless the photo is very small.
Sinc: It is quite similar to Cubic, but it uses “ringing” pattern instead of “blurring.” It works best for detailed graphics images.
As an average user, you should always use “Cubic” algorithm, and only change it if your image requires.
X and Y Resolution
You should not worry this, as it is used for printing purpose mostly. If you need to convert the picture to paper, then option can be used to spread “pixels” over “inches” or other measurement options. If you have no such intention, leave this option.
Resizing the Image
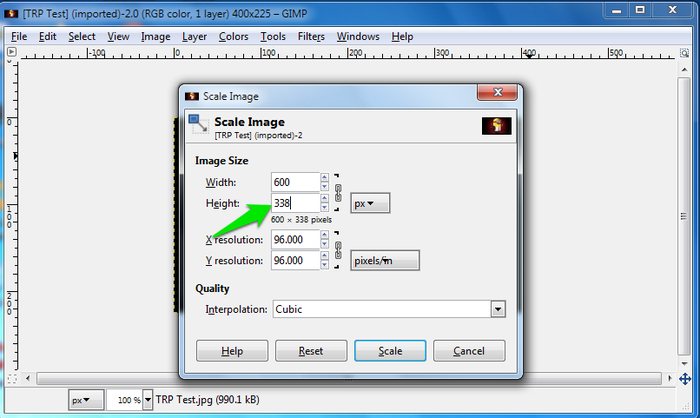
Now that you know what all these options mean, it should be easier to make your choice. For most users, the default options are perfect, and they should just provide “Width” and “Height” to resize the image. However, in rare situations, you can take advantage of other options as well.
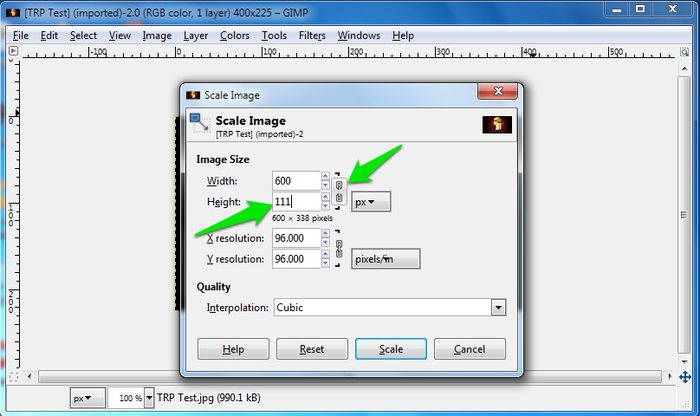
To resize the image, provide the required Width or Height and the other factor will be adjusted according to your selection. For example, if you will enter 600 Width, 338 Height will be automatically selected, and vice versa.
You can also provide custom Height and Width if it is required. To do so, click on the “Chain” icon on the right, and provide your desired Width and Height. This time the numbers will not be automatically adjusted.
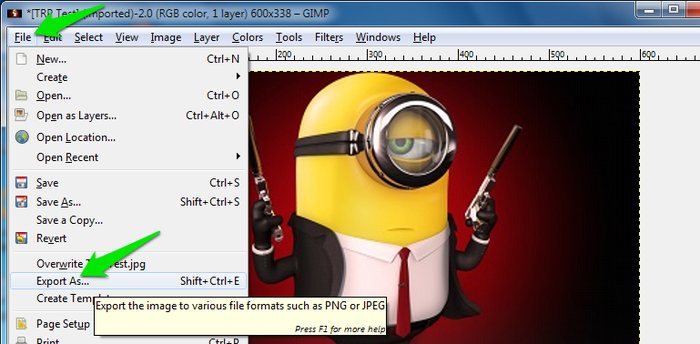
When you are done, just click on “Scale” below and your image will be resized. To save the image, you can click on “File” and then select “Export As” from the menu to save the image.
Also Read: 6 Best Photo Organizing Tools and Alternatives for Picasa
Other Tools to Resize Images in Windows
Above was the full process of how you can effectively resize an image using a robust photo manipulation tool. If you were looking for a simpler tool that will just give you enough options to resize an image, then you can check out our list below. The below-mentioned image resizer tools are free to use and very simple as well, perfect for novice users.
1. Image Resizer
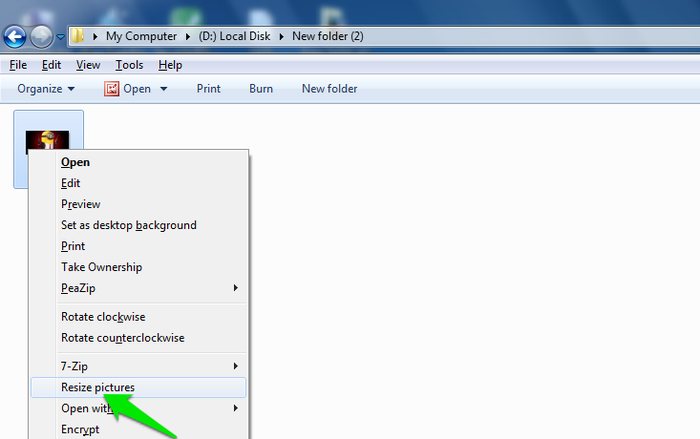
This is the easiest image resizing app in our list that is only 900kb in size and works directly from the Windows explorer. Once you install the program, you will not see any .exe file to launch the application. Instead, it will be added to the context menu (right-click menu). All you have to do is right click on the picture or pictures you want to resize and select “Resize Pictures” from the context menu.
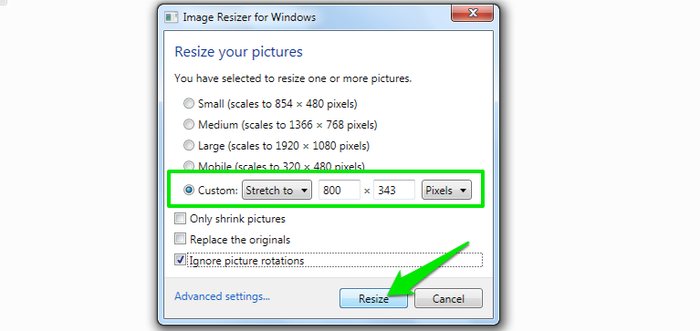
A tiny interface will open up where you will see some already configured sizes and an option to provide custom Width and Height. Just use these options to specify image size and click on “Resize” to resize the image(s). The images resized will be saved in the same directory where the originals images are.
Also See: 6 Best Free Online Photo Collage Maker to Make Photo Collages Online
2. RIOT
RIOT is a very light image manipulation tool with tons of features. Its main purpose is to compress images and decrease their storage size. However, it also comes with the ability to resize images. You can click on “Edit” menu and select “Resample” from it to open resizing options. There are not many options to configure, just provide Width and Height and save the compressed image.
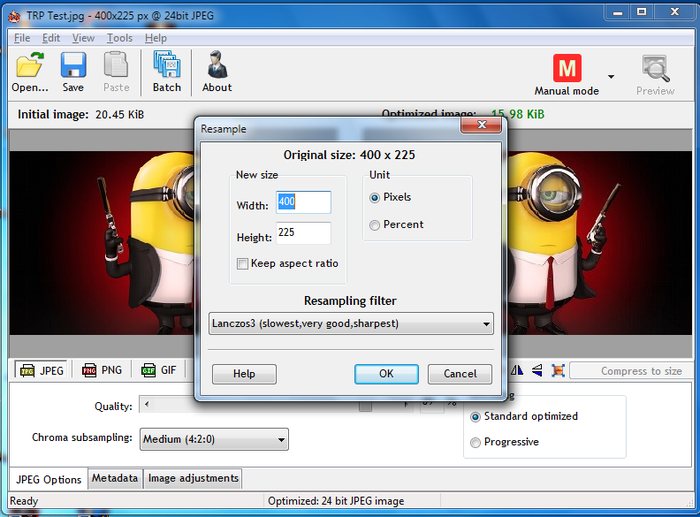
It also has a batch mode, which you can use to resize and compress photos in batch. Other than that, it can also change image type, adjust effects, remove meta data and invert pictures.
3. Light Image Resizer
This is a free image resizer tool only for private use. If you want to use it at the commercial level, you will have to buy a license. The tool is only made of resizing images and comes with many advanced options. It offers a step-by-step guide to each process and also has separate tutorials to guide novice users.
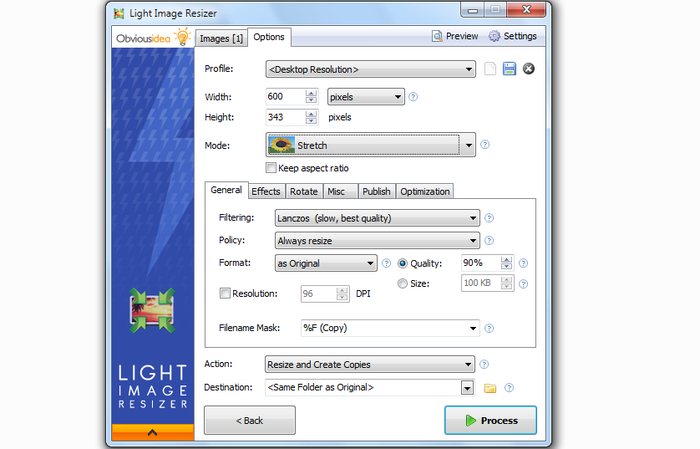
You can process more than one images, and you can resize images using different algorithms like GIMP. The tool is great, but its “Paid” version can be a little annoying.
Also Read: 31+ Best Free Graphic Design Software Tools to Create Stunning Graphic Visuals
The Pro Review From TechReviewPro
Resizing an image is a really simple task, and in most cases, you just need to provide Height and Width, and the software will resize it. However, in some cases, you may have different needs, which is why we have covered both simple and advanced ways to resize images in Windows. If you frequently resize images, then Image Resizer is a great tool. Otherwise, you can also try out GIMP and take advantage of the advanced features it has to offer.
Which image resizer tools or software do you use to resize images in Windows? Do let us all know in the comments below.
Don’t Miss:
- 5 Best Facial Recognition Search Engines to Search Person’s Faces Online
- 7 Best YouTube to MP3 Converts to Convert YouTube Videos to MP3
- 13 Best Android Camera Apps to Improve Android Camera’s Picture Quality
- 8 Best Reverse Image Search Tools to Do Reverse Image Search
- How to Capture Windows Screen? – Top 10 Best Screen Recording Software for Windows