YouTube is the largest video-sharing website that allows you to share your videos easily with the whole world. YouTube makes it simple to upload videos and share it with your viewers. Furthermore, it comes with a reliable video editor that will let you easily edit your videos to make them look their best. And one of the most notable features of YouTube editor is the Blur which allows you to blur YouTube videos.
YouTube editor lets you quickly blur any part of your video without causing any confusions. The blur feature can be handy if you need to hide specific faces in your video or even specific objects. For example, you can hide copyrighted material in your video or maybe hide the face of the person you are interviewing.
Also Read: 7 Cool YouTube Tips and Tricks to Watch YouTube Videos Like a Pro
Contents
How to Blur YouTube Videos to Hide Things in YouTube Videos?
There are numerous uses of the blur feature, and we are going to show you how you can blur videos on YouTube. We will show you both how to blur faces in YouTube videos and also how to blur specific areas in YouTube videos.
Upload a Video for Editing
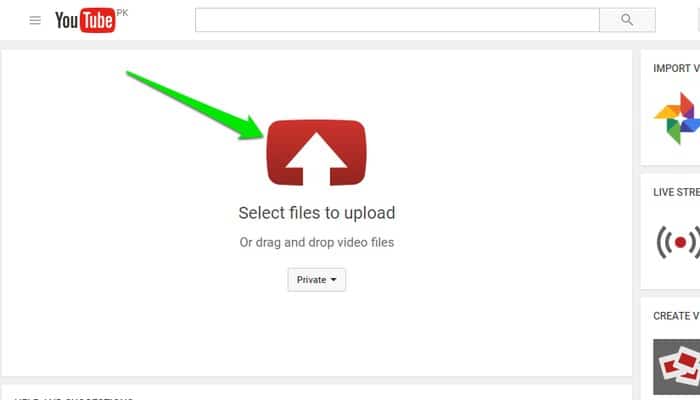
You first need to upload the video that you would like to blur. If it is already uploaded, then skip to the next step. Click on the “Upload” button next to the search bar in YouTube.

On the upload page, click in the middle and select your video from the file explorer window. Depending on the size of the video, it may take few minutes to upload the video. Once uploaded, click on the “Done” button to upload the video.
Add Blur Effect to the YouTube Video
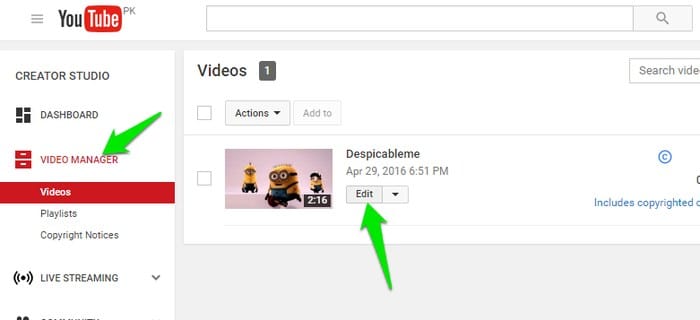
Now that your video is available on YouTube, just click on your account icon and select “Create studio” from the dialog.

Here, click on “Video Manager” from the left side menu and you will see all your videos. Just click on the “Edit” button on the video that you would like to blur.
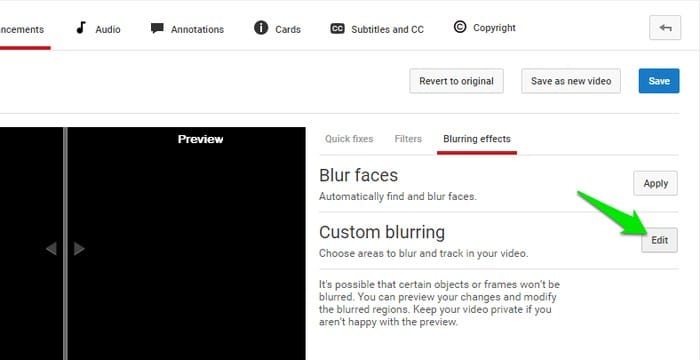
In the editing options, click on the “Enhancement” tab and then select “Blurring effects” from the right side of the window. There you will find two options, “Blur faces” and “Custom blurring.”
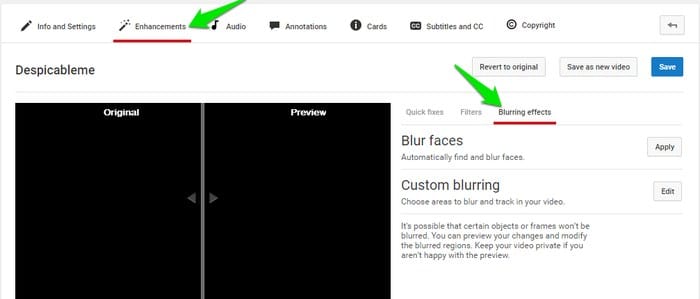
Blur faces
Blur faces is a no-brainer choice, all you have to do is click on the “Apply” button next to it, and it will automatically apply a blur to all the faces in the video.
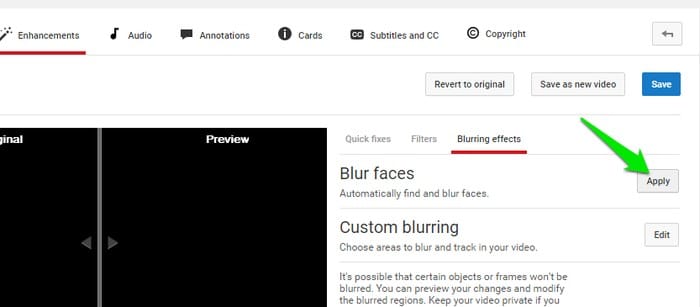
Although, YouTube is excellent at detecting faces and applying the blur to them. However for some reasons, if it’s hard to recognize the face, then it may make a mistake. In such situation, you have the Custom blurring option to blur the areas yourself, like explained below.
Custom blurring
If you need to blur particular object or area in the YouTube video, then you can also manually blur any area in the video. Click on the “Edit” button next to the “Custom blurring” option and your video will open in a separate editor.
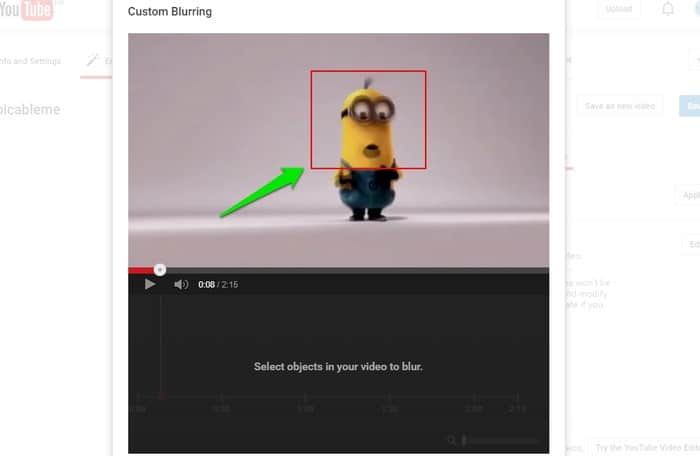
Here play the video and select the object or area that you would like to hide. The player will start blurring, and you can use the blurring options below the video to configure how you want to blur.
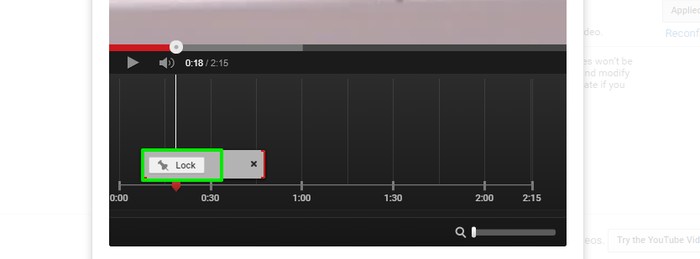
Move the slider to the editing option below to set for how long you would like to blur the selected area. By default, the blur settings are in “Lock” mode, which means YouTube will automatically blur the area and keep track of it. The tracking is excellent, and you should have no problem blurring any object during the whole video.
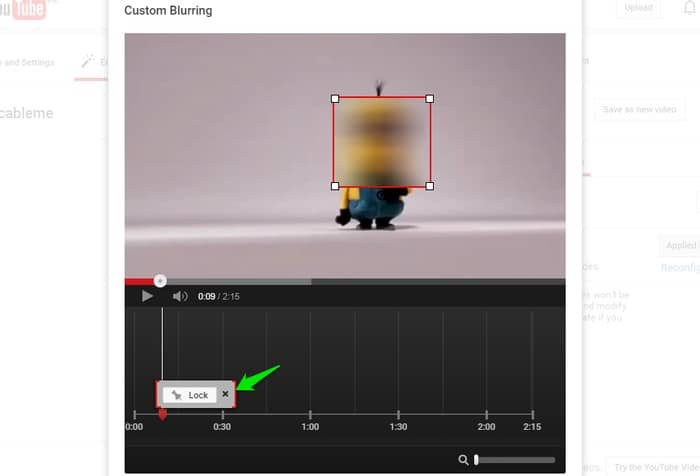
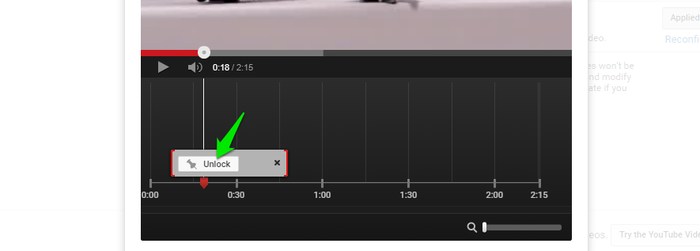
In case you need to blur a particular section in the video, then you can click on the “Lock” button to switch to “Unlock” mode.
In the unlocking mode, the blur area will stay at one place without automatically following the defined object.
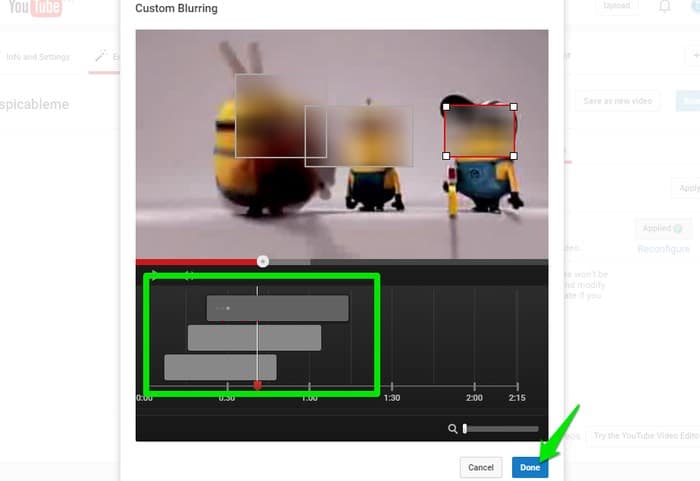
You can also blur multiple regions, and each blur patch will have its slider to configure it according to your need. If you see that YouTube is not picking up an object right, then you may also manually move the blur patch to help YouTube keep the object blurred. When you finished editing, just click on “Done” and preview how your video will look live.
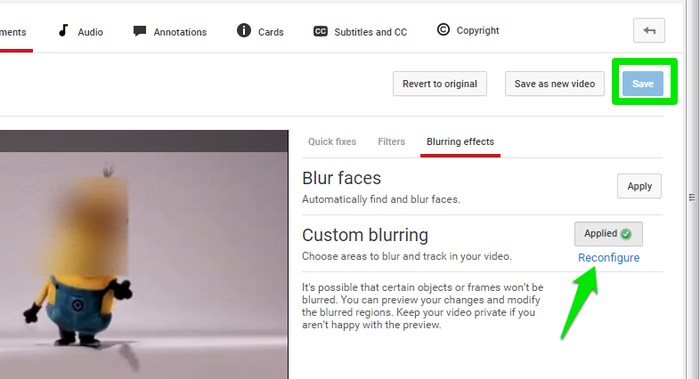
If there is any problem, you can click on the “Reconfigure” button to edit it again, otherwise, click on “Save” to save the changes.
Also Read: 7 YouTube Keyboard Shortcuts to Control YouTube with Keyboard
The Pro Review From TechReviewPro
Blurring videos is an excellent way to keep your privacy when needed. Thankfully, the video sharing giant gives us this functionality built-in. Although YouTube will not give you full control over blurring as it will automatically blur areas based on your defined area, it is entirely accurate to forgive. You do have the option to put YouTube on the right track, but it is still not full control. How are you going to use the blur feature offered by YouTube, let us know in the comments?
Don’t Miss:
- 7 Best YouTube to MP3 Converters to Convert YouTube Videos to MP3
- 13 Gmail Keyboard Shortcuts to Save Time Emailing and Be More Productive
- GarageBand for Android: 7 Amazing Best Music Making Apps for Android
- 15 Best Gmail Tips and Tricks to Use Gmail Like a Pro
- Electronic Signature in Word: How to Electronically Sign a Word Document?

