In this digital age, we use digital editors to write documents, such as Microsoft Word or Google Docs. While we digitally work with documents, the need of signing the document and inserting the digital signature to authenticate them also persists. However, it can be tedious to scan the document and sign it, and then scan it again to send it online. Thankfully, digital documents can also be signed electronically by drawing your sign or using an image of your signature.
If you are dealing with a Microsoft Word document, then there are multiple ways to sign a word document or add an electronic signature in Word. If you have a Microsoft Office suite installed on your PC, then you can quickly sign documents right from the Microsoft Word processor. Otherwise, we will show you third-party solutions to add an electronic signature in word and electronically sign that document.
Also Read: 15 Best Gmail Tips and Tricks to Use Gmail Like a Pro
Contents
- Insert Electronic Signature in Word: How to Electronically Sign a Word Document?
- Method #1: Using Microsoft Word to Create and Insert an Electronic Signature in Word
- Method #2: Use Google Docs to Electronically Sign a Word Document
- Method #3: Using Electronic Signature Software Like “Hello Sign” to Insert Signature in Word
- The Pro Review From TechReviewPro
Insert Electronic Signature in Word: How to Electronically Sign a Word Document?
Before proceeding, it should be kept in mind that electronic signature isn’t secure as you may think. It is just like any other ink signature and can be easily copied and applied somewhere else (possibly even easier than ink sign). So make sure you don’t use an electronic signature to authenticate very sensitive documents. That said, let’s see how to sign a word document electronically in Word.
Method #1: Using Microsoft Word to Create and Insert an Electronic Signature in Word
All versions of Microsoft Word come with the ability to sign the document digitally and protect it from being edited. Digital sign is a little different from just adding your signature to the document, as it will protect the document from being modified and any edits will void the sign. It offers more protection for sensitive documents, but may not be the best choice if you are just signing a document to confirm that you have read the document.
Note: We are using Microsoft Word 2007 edition for demonstration. Instructions are the same for all the other versions of Word, so you should have no problem following the below instructions.
Add a Signature Field
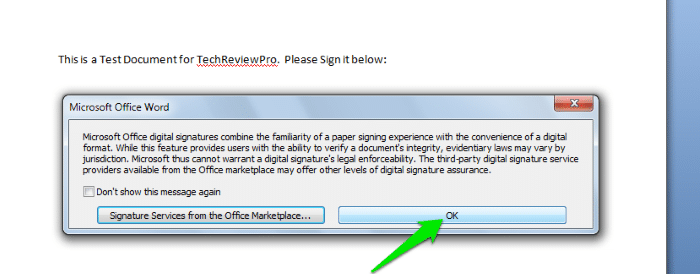
The first thing you need to do, whether you are signing a document or want someone to sign it is to add a signature field that you or anyone else may sign. To add a signature field, go to the “Insert” tab at the top and click on the upside down arrow next to the “Signature Line” button. From the drop-down menu, click on “Microsoft Office Signature Line” and a confirmation message will show up, click “OK” here.

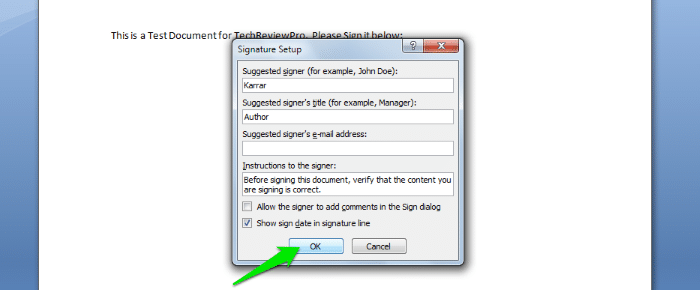
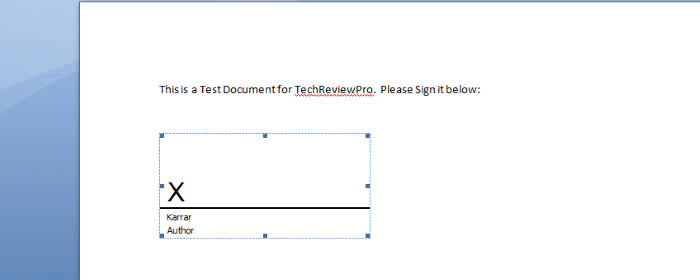
Now a Signature Setup window will open up where you can specify the name and position of the sign and attach date when the person will sign the word document. All these fields are optional, and you may fill them or directly click on “OK” to create a signature field.
Sign the Document
Once the signature field is created, you can send the document to anyone, and they can sign it, or you can sign it yourself. Double-click on the signature field and you will be prompted to save the document in a format in which digital signature is supported, just click “Yes” here.

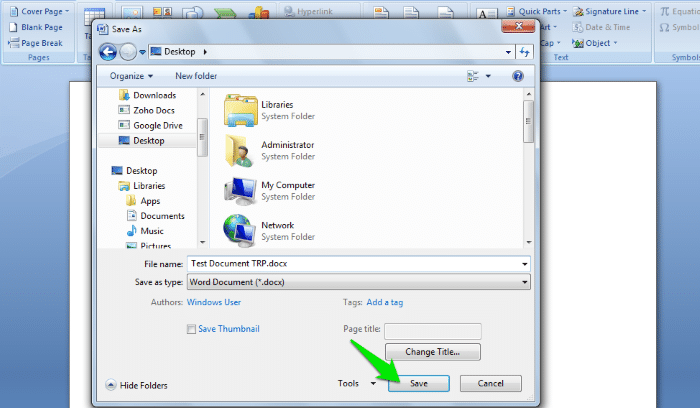
When you save the document, a “Sign” dialogue will open up where you have two ways to sign the document and bind it. You can enter either your name or use a picture with your signature in it. Both signatures will provide similar security, as both of them will prevent the document from being edited and force edits will void it. However, a picture of your real signature may be more appropriate and could be a requirement of a company. Also, on a tablet, you will get an additional option to “Draw” your signature.
You can sign a white paper (larger than usual) and take a picture of it with a camera or your smartphone. Then move that picture to your PC and use the “Select Image” button on the “Sign” dialogue to import the picture and use as the signature.
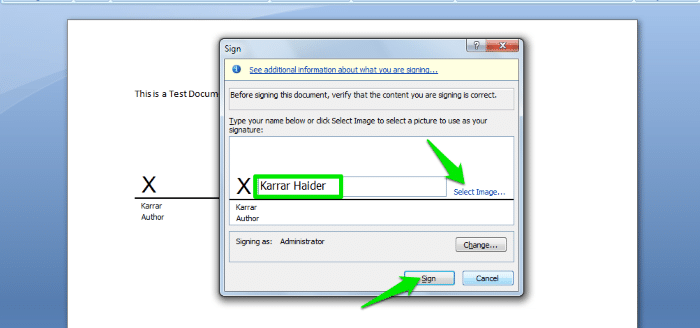
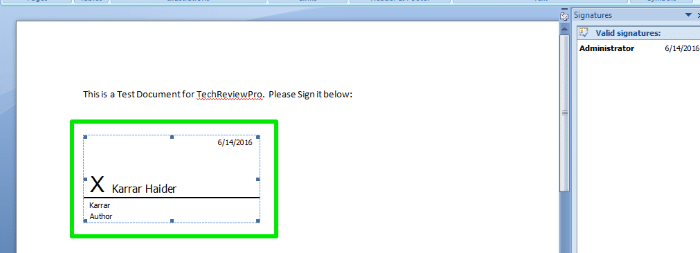
Once the image is uploaded or you have entered your name, click on “Sign” to sign the document. Do review the content of the document before clicking sign, because you will not be able to edit it once it is signed. Your name will be added, and the date will be added at the top right corner.
Method #2: Use Google Docs to Electronically Sign a Word Document
You can also use Google Docs to sign a Word document electronically. Google Docs has a drawing feature that lets you draw your signature and then add it anywhere in the document. However, this will not bind the document with your signature, and anyone can easily edit or remove your signature from the Word document. Although, it can be a solution if the document is not too sensitive and you just need to add your signature to ensure that you have read the document and authenticated it.
If it is just a simple document with text, then you can copy/paste everything into Google Docs. If it contains graphical material, then you will have to open the document with Google Docs using a Chrome extensions, you can get instruction for this from Google official support page.
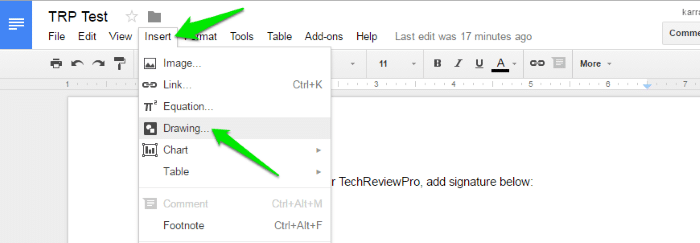
Once the content is in Google Docs, click on the “Insert” button at the top and select “Drawing” from the menu.
When the drawing box opens up, click on the upside down arrow next to the “Line” button and select “Scribble” style from it. It will allow you to draw your signature freely in the middle of the drawing box.

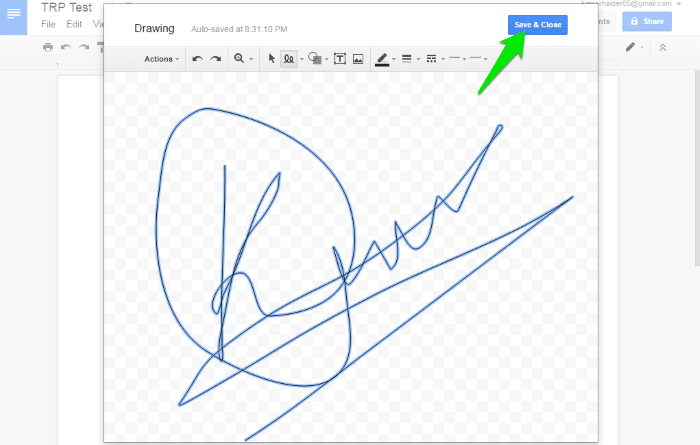
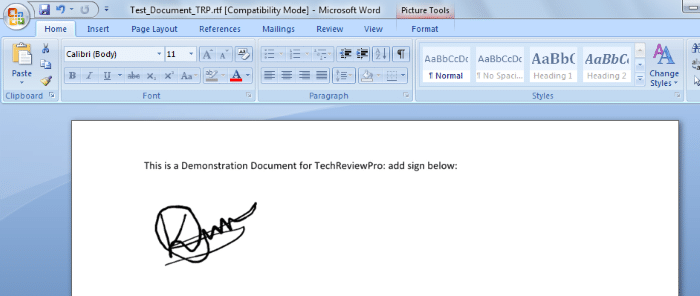
The signature will be quite significantly large in the document, but you can easily resize it to a comfortable size by grabbing from the corners and dragging in.

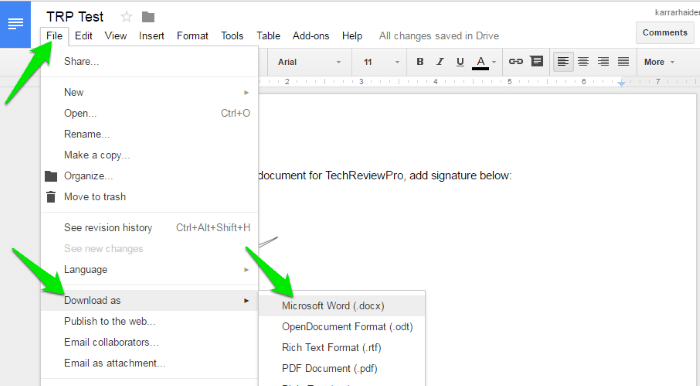
Now just save the document as Microsoft Word and it will be signed and ready to be forwarded. To do so, click on the “File” menu at the top and hover your mouse cursor over “Download as”. From the right side menu that opens up, click on “Microsoft Word” and your file will be downloaded in .docx format.
Method #3: Using Electronic Signature Software Like “Hello Sign” to Insert Signature in Word
Hello Sign is a great online electronic signature software tool that lets you sign unlimited documents for free and send three documents per month to be signed for free. The process is very simple, just go to the Hello Sign website and sign in with your Google account or create a new account with your email. Once inside the account, click on “Just Me” button and upload your Word file. Using different methods, including cloud storage, upload from PC or drag & drop.

There are multiple options for uploading your Word file as you may upload the file using different methods, including cloud storage, upload from PC or drag & drop.

Once the file is uploaded, click on “Fill Out & Sign” button to start editing the document.

In the editor, you can click on the “Signature” button at the top left corner to see all the signing options.

- draw,
- type,
- upload signature image or
- use your smartphone to take a picture and email your signature.
Use any of the options to provide your signature and click on “Insert” button at the bottom to insert the signature in the document.
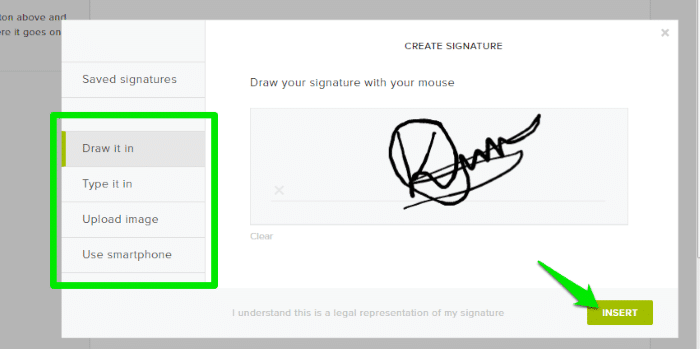
The signature can be resized according to your need, and once you are comfortable with the look click on “Continue”.

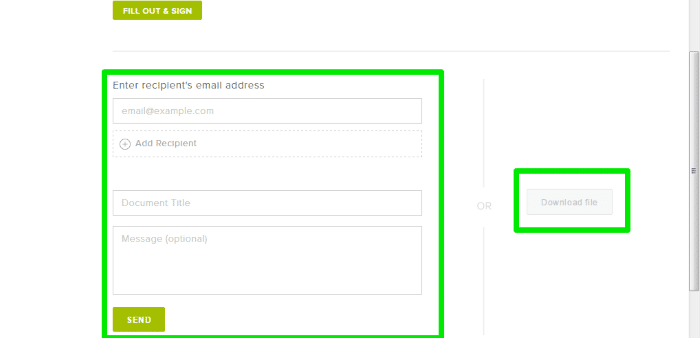
Now you can either send the document directly to the receiver using Hello Sign service or download it and do whatever you like with it. If you download it, it will be downloaded as a PDF file. So you will have to convert the PDF file into Word if you strictly need a Word file. However, the converted file will not be editable, which is a good thing I suppose.
Also Read: 5 Best Comic Websites to Download or Read Comics Online for Free
The Pro Review From TechReviewPro
Signing a document electronically is becoming a universal need as more and more companies are taking their business online. As companies work in an online environment, the documents are also digital and need to be signed digitally. If you are dealing with a Word document, then to add the electronic signature in Word, all the above three methods should help you sign your document and authenticate it.
You need to keep in mind that each method has a different way of signing the document and offers a different protection. Signing with Microsoft Word will digitally bind the document with the signature and also make it uneditable, while signing with Google Docs will just add a picture of your signature into the document that can be easily removed or copied. Same as that, Hello Sign will make the document completely uneditable. Do let us know in the comments how you sign digital documents.
Don’t Miss:
- How to Convert PDF to Word Document Online for Free?
- 11 Best Online PDF to Word Converters & Word to PDF Converters
- 7 Best YouTube to MP3 Converters to Convert YouTube Videos to MP3
- 9 Best Browser Dictionary Extensions to Find Words Meaning Online
- How to Send an Anonymous Email from Anonymous Email Account?


